Now that you have created and attached the new material to part of your model, you will want to render the model to see what the new material looks like. Bear in mind that the material will look different in different lighting conditions, so make sure that you have set up any lights you might need before you render the model. See the Adding Sunlight to your Drawings tutorial for details on how to set up a light that simulates sunlight.
To render the model, select View![]() Render
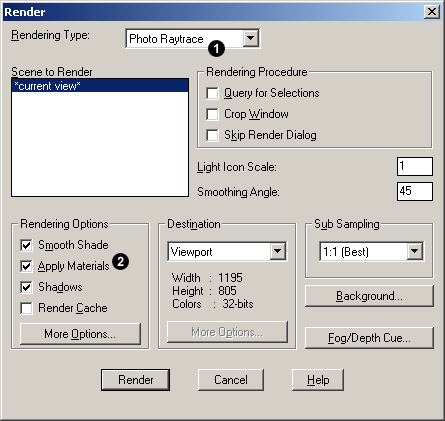
Render![]() Render… from the pull-down menu. You will now see the Render dialogue box, shown above. Set the Render Type to either "Photo Real" or "Photo Raytrace". Materials will not be displayed if the default "Render" render type is used. Also, make sure that the Apply Materials option is checked in the Rendering Options section of the dialogue box. Click the Render button to begin the render.
Render… from the pull-down menu. You will now see the Render dialogue box, shown above. Set the Render Type to either "Photo Real" or "Photo Raytrace". Materials will not be displayed if the default "Render" render type is used. Also, make sure that the Apply Materials option is checked in the Rendering Options section of the dialogue box. Click the Render button to begin the render.
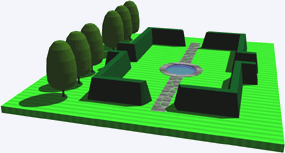 The first render with the new material is shown in the illustration on the right. As you can see, there are two problems with it. First of all, the stripes are too narrow, they should be about twice the width. Second, the rendered effect in the prevailing lighting conditions is far too bright. In order to get the material to display the way we want, we're going to have to make some modifications.


Your comment here:
Post a Comment