Before we get to grips with AutoCAD materials, we need to create an image that will be used as the basis of the AutoCAD material. In this tutorial, we will use Photoshop for this part of the process but you can use another bitmap editor if you prefer.
- Start Photoshop and open a new image, from the pull-down menu. You will now see the New image dialogue box. You can use this dialogue box to give your image a Name and to set the Width and Height dimensions. OK, so how big should the bitmap tile be? Well, it depends on how complex your material is. In this case and in most cases where the pattern is relatively simple, a tile of 100 pixels by 100 pixels will work just fine. So, give the image a suitable name, set the measurement units to pixels (if they aren't already) and enter a value of 100 for both the Width and the Height. Click the OK button.

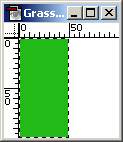
- Next, use the Rectangular Marquee Tool
 to select one half of the image. You can do this with precision by looking at the Info Palette as you drag the marquee.
 - Now use the Color palette to select a green for the grass and then use the Paint Bucket Tool
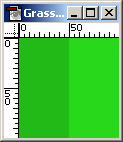
 to flood fill the half of the bitmap which is selected. Your image should now look something like the illustration on the right.
 - Select the other half of the image by inverting the selection, from the pull-down menu. Select a complimentary green from the Color palette for the other half of the image and use the Paint Bucket Tool to fill the selection. Your image should now look similar to the one on the right. So far, we've just used flat colours to create our bitmap but grass has a texture to it that our image doesn't have. In order to make our grass look a little more realistic, we'll add some texture to the image.

- The Photoshop Noise filter is probably one of the most useful filters that comes with the application. Most materials look better with a bit of texture, whether you are creating grass, concrete, rock or whatever. In all cases, the Noise filter can be used to add just the right amount of texture.
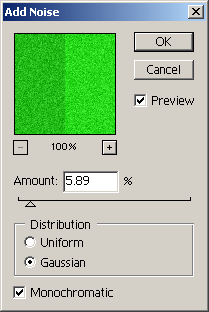
Start the Noise filter from the pull-down menu, . You will be presented with a small dialogue box that enables you to control the amount and type of noise you want to add to the image.

- As you can see from the illustration on the right, there are three basic controls. The first, Amount, is fairly obvious, use the slider to set the percentage of noise. The Distribution option changes the pattern of noise; Gaussian looks slightly more random than Uniform. Finally, the Monochromatic option can be used to determine the colour of the noise. Basic noise adds a range of colours to the image, irrespective of the colour of the background. When Monochromatic is selected, the colour of the added noise matches that of the background. The best way to get to grips with these controls is to play about with them. For the grass image, the settings shown in the illustration were used.
- When you are happy with the image, you will need to save it so that it can be used by AutoCAD. What format should be used and where should it be saved? Well, AutoCAD can use a number of common bitmap file formats and so the sensible option is to keep the file size as small as possible, so JPEG is a good format to use.
If you intend to keep this material for future use, it is a good idea to save the image somewhere sensible (not the Desktop!) like the folder where you keep your textures or to the AutoCAD texture folder, usually C:/Program Files/AutoCAD/Textures. This is important because every time you render using the new material, AutoCAD must find the image file in order to render the material correctly. If the image file is moved or deleted, AutoCAD will not find it and your rendered image will not look right.
To save the image, use the Photoshop Save for Web option, from the pull-down menu. This will allow you to choose a suitable compression level.


Your comment here:
Post a Comment